

I was intrigued by this small embroidery (Embroidery Sample British Museum 1895,0810.37a,b) when I first saw it published in The Inventory of Henry VIII: Textiles and Dress Chapter 5: The Art of the Broderers by Santina Levey (Plate 77, page 158). The rose and crown are often embroidered on ceremonial objects, the Elizabethan Burse for example. The cipher of Henry VIII appears on the panel on the right indicating that it was likely embroidered prior to his death in 1547 making it one of the earliest extant pieces of what we refer to now as traditional English goldwork. https://www.britishmuseum.org/collection/object/H_1895-0810-37-b

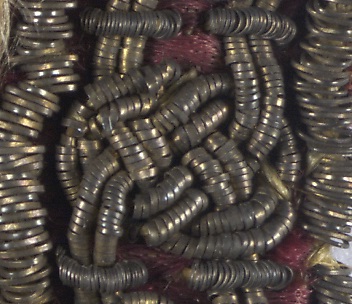
Each of these very small panels, only 3½ inches square, has a border of true love knots that is the subject of my next experiment. I have not had the opportunity to examine this piece, but on very close inspection of the photograph, it appears that the metal purls of the border could have been created in two different methods. The knots could have been sewn individually onto the satin ground fabric with cut purls or they may have been knotted first similar to a braid and then secured to the ground with two purls between each knot.
Experiment #1 The Continuous Knot


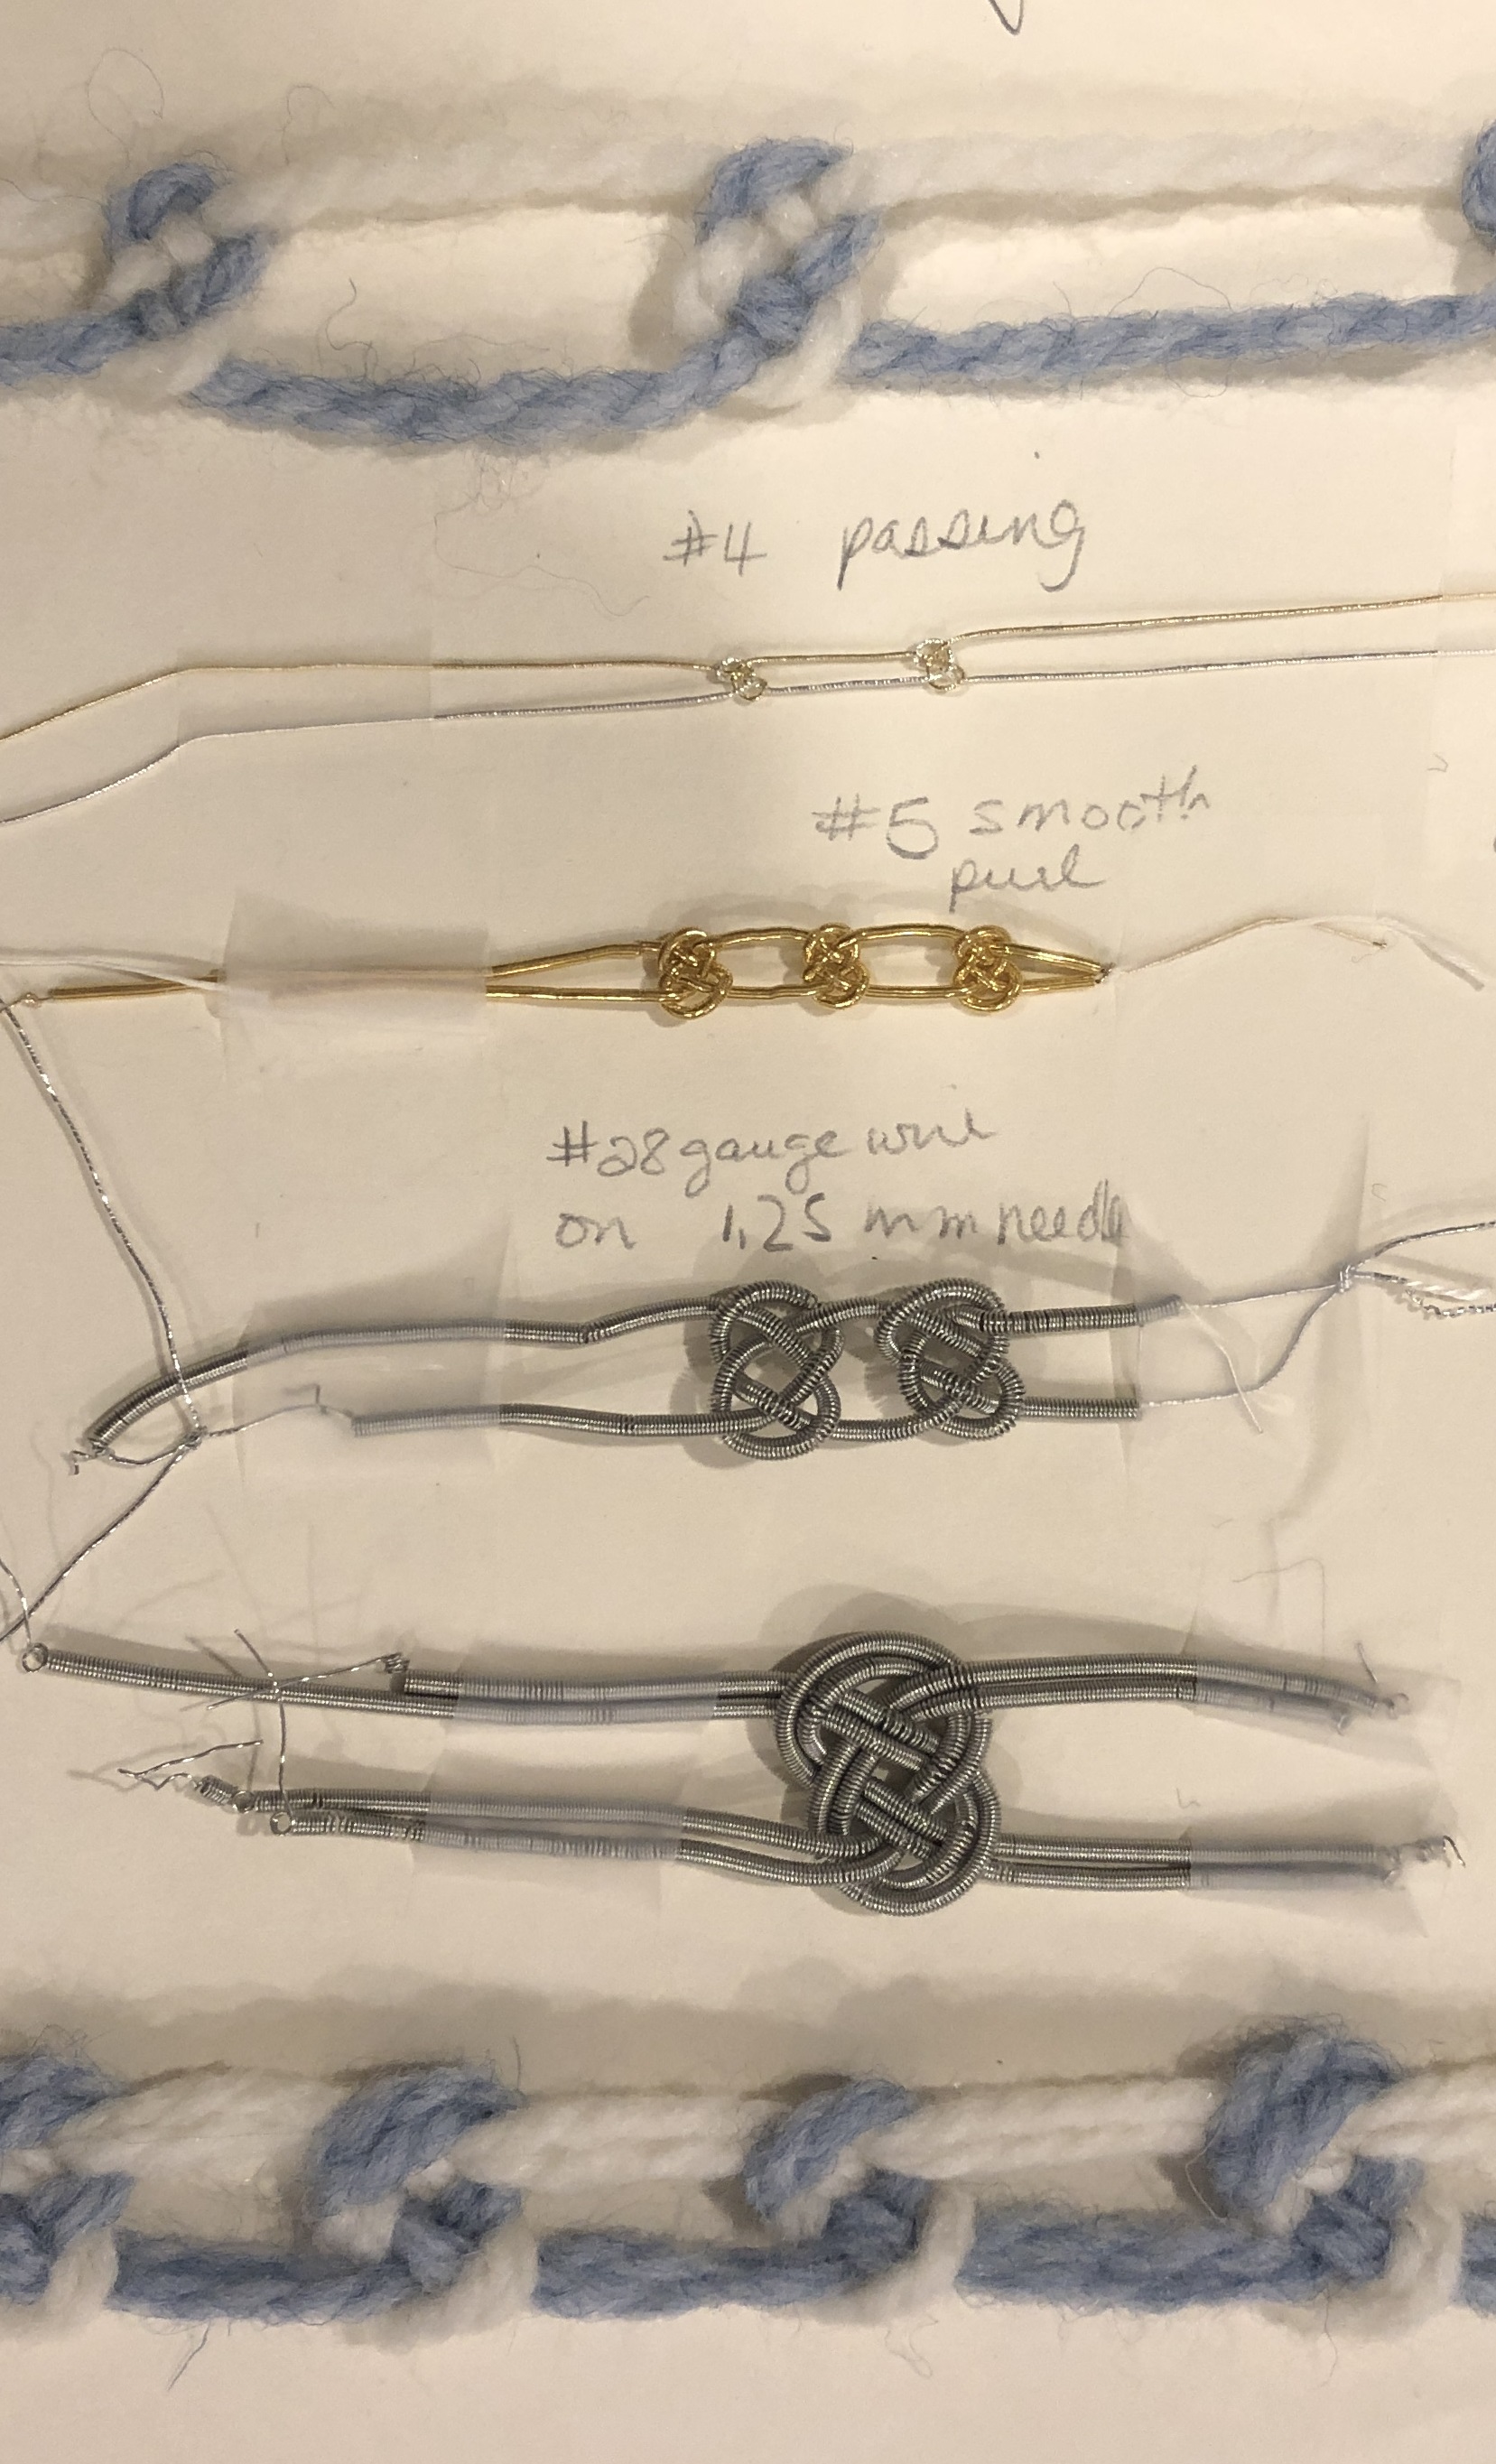
How to decipher the knot? Many of the knots have been distorted so I searched out the most well defined knot and drew it exactly as I saw it. Then I simplified the path by reducing the number of threads from four to two and added directional arrows. Then came the hard part – actually making the knot. I used two different colours of bulky wool and went on to try a number of different materials eventually gaining the confidence to tie the knot in a series with two pairs of threads.


To reproduce the size and colour, I used #5 smooth purl threaded with a strand of linen and put a needle on each end to make it easier to weave in and out. I used only two lengths of purl to tie the series of knots. I had to leave it loose enough to thread in the pairs and it was very difficult to keep the correct tension and size as the knots progressed so out came the old macramé T-pins.

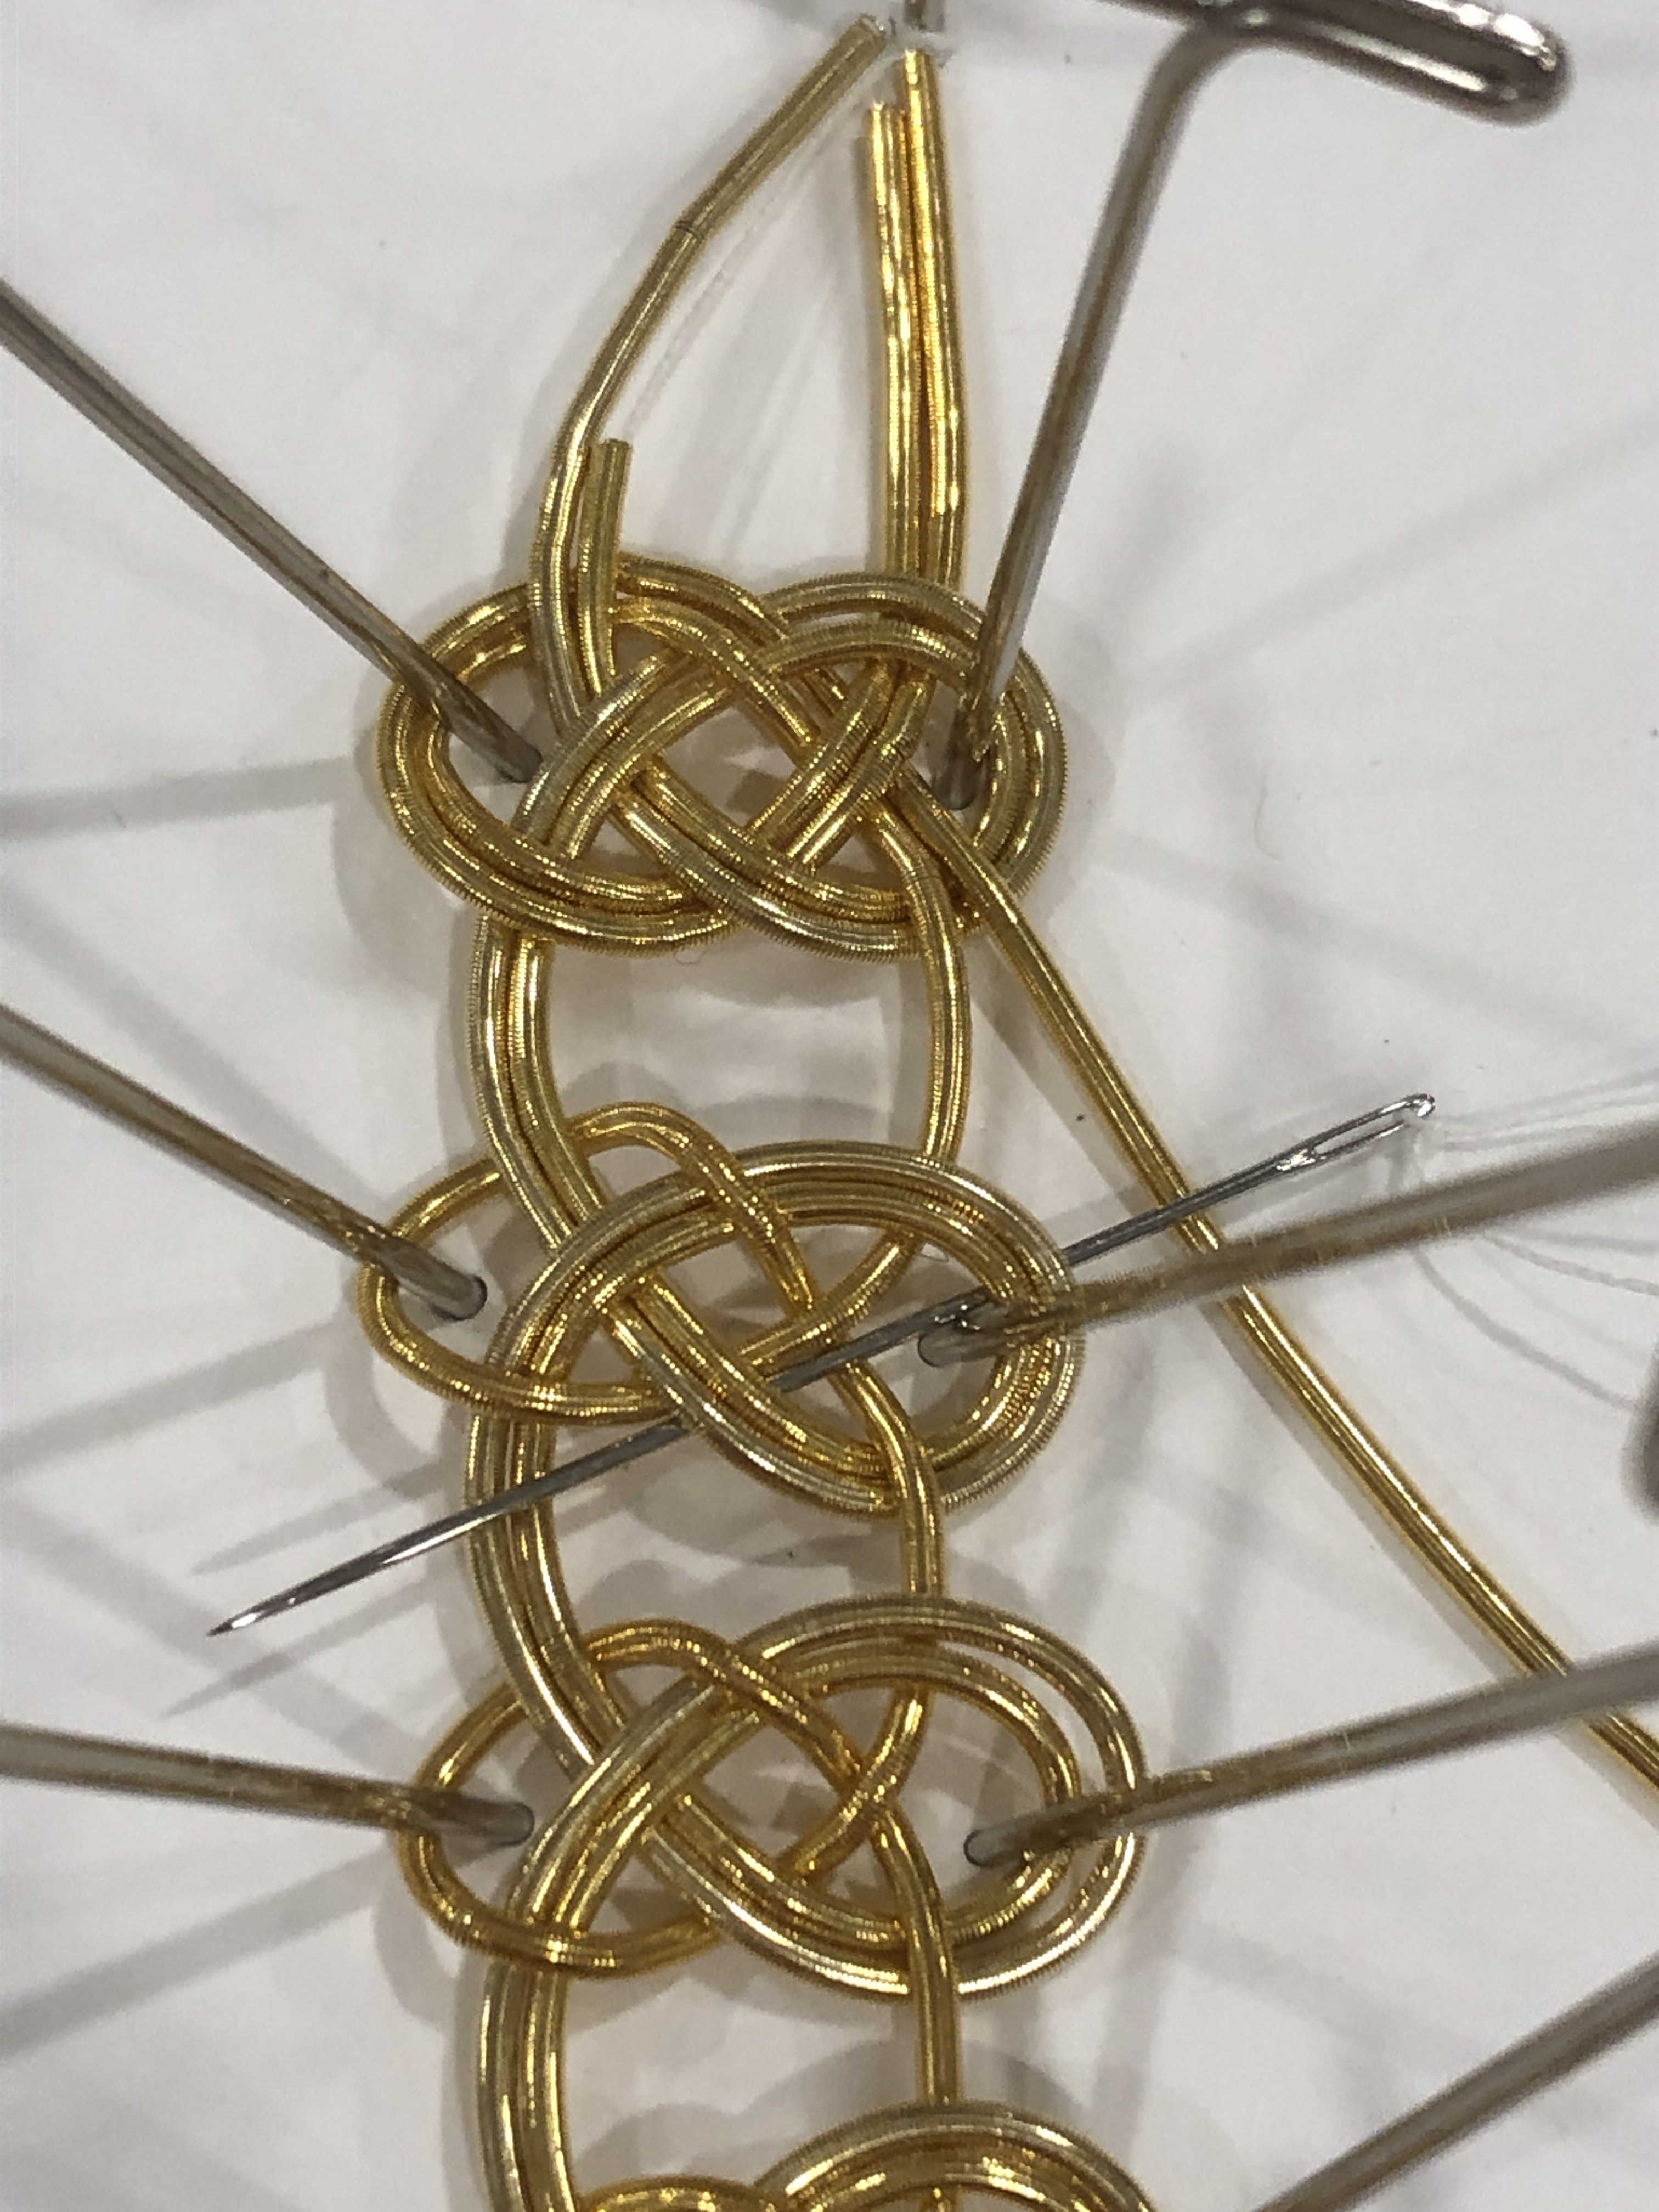

The pins were removed and the row of knots was secured to the velvet with small pieces of purl between the knots. The excess purl was cut and the linen thread was secured on the back.

The knots were not uniform and a little bit large so I drew a ½ inch by 3½ inch rectangle on the foam core and tried to work within the space. I also needed a guideline on the velvet because the knots loosen during the transfer.

Conclusion
There must be an easier way! Once again, the modern thread may have made it a bit more challenging to tie the knots. The smoothness of the purl made it slippery and difficult to maintain the tension but it had the benefit of making it easier to pull in and out. The Tudor purl is much less consistent and this may be a result of keeping tension. In a comparison photograph, the wire used to make the Tudor thread appears to be a larger gauge and much flatter. I expect there is a machine that will make these knots now. Next week Experiment #2 Individually Cut Purls.


What a lovely experiment, Cindy! Have you tried using a “real” gold purl? I find that the threads with the slightly higher gold content behave quite differently than the ones sold as gilt.
Good question, Jessica! Actually, I have ordered a number of samples, passing and purl, from Maurer in both gold and gilt, and will order some once I have a good look! I’m looking forward to more experiments.
I am going to give this a try with some silk wrapped purl. It will be a wee bit out of the correct period but I think the effect would still be lovely.
Good idea, Mike! If you can, also try two colours of silk gimp, the knot will pull nice and tight.